Everything you need to get started with Airgap Voice — from first launch to advanced settings.
Getting Started
System Requirements
macOS 15 (Sequoia) or later
Apple Silicon — M1, M2, M3, or M4 series
Microphone (built-in or external)
Installation
Download Airgap Voice from the Mac App Store, or request an
Evaluation Kit to receive a direct download link.
First Launch
Airgap Voice is a menu bar utility. After installation, click the Airgap
Voice icon in your Mac's menu bar to open the main menu. There is no Dock icon and no
main window — the menu bar is your primary interface.
Granting Accessibility Permission
Why Is This Needed?
Airgap Voice uses macOS Accessibility to type transcribed text directly into the active
application via simulated keystrokes. Without this permission, transcription will work
but the text cannot be inserted into other apps.
Step-by-Step
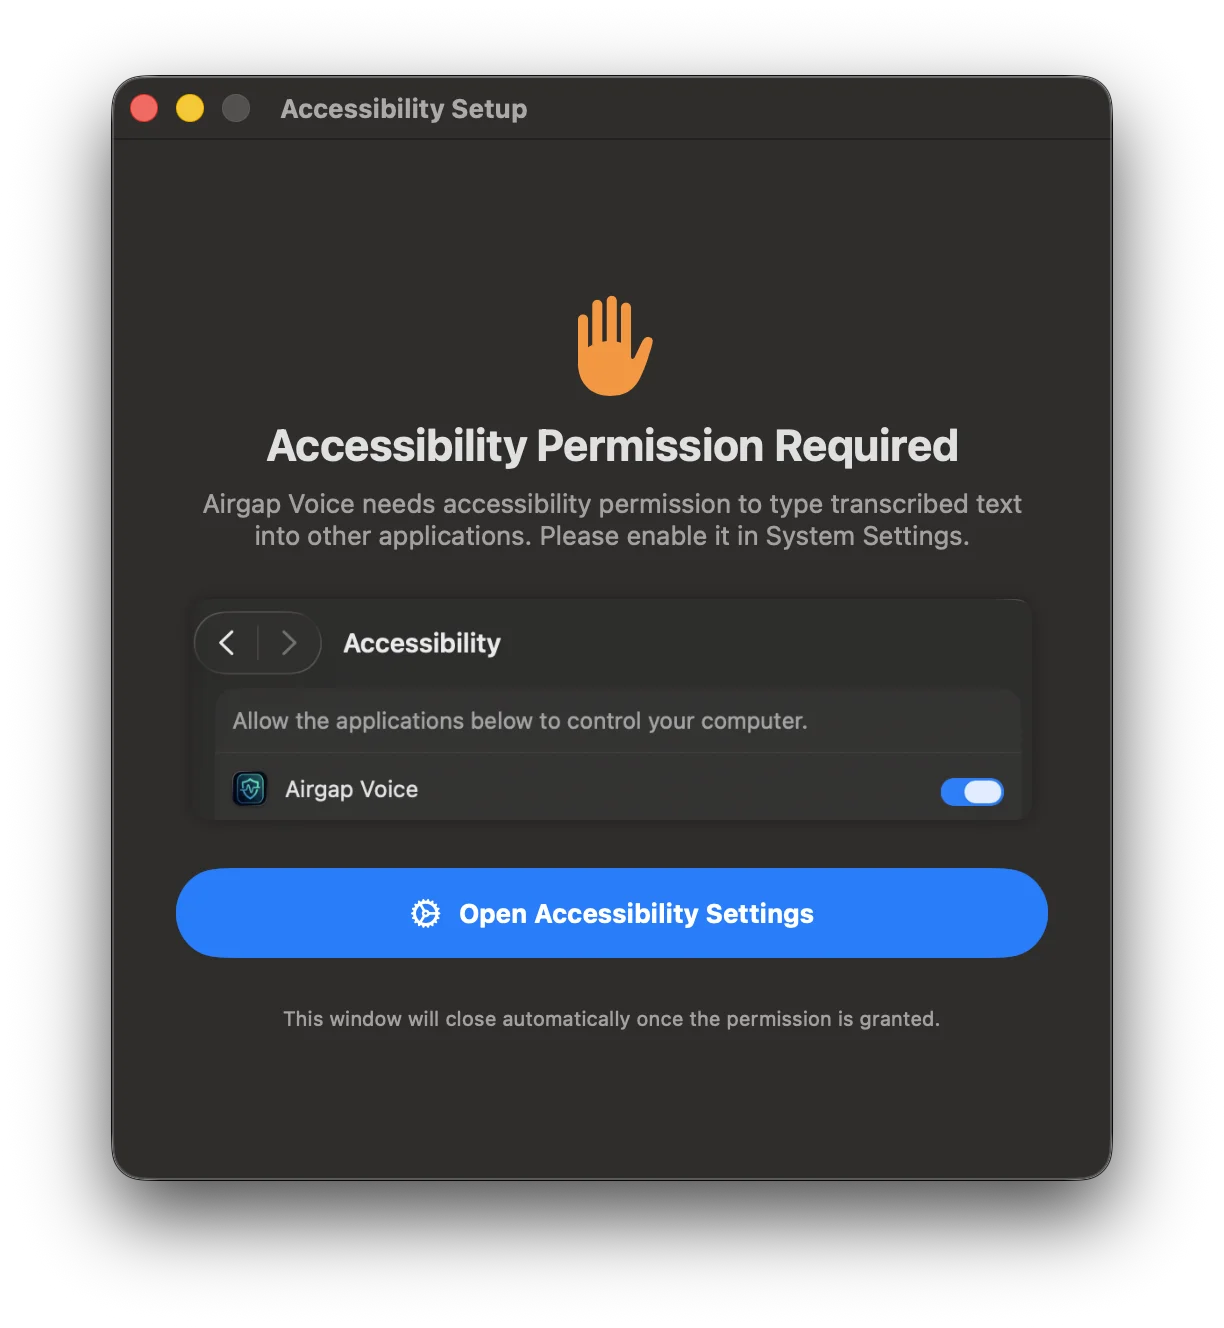
On first launch, the app presents the Accessibility Permission Required
dialog:
The onboarding dialog explains why the permission is needed and provides a
direct button to open System Settings.
Click Open Accessibility Settings.
In System Settings → Privacy & Security → Accessibility, find Airgap
Voice.
Toggle the switch to ON.
The Accessibility toggle in macOS System Settings showing Airgap Voice
enabled.
Note: The permission dialog closes automatically once the toggle is
enabled. You only need to do this once.
The Main Menu
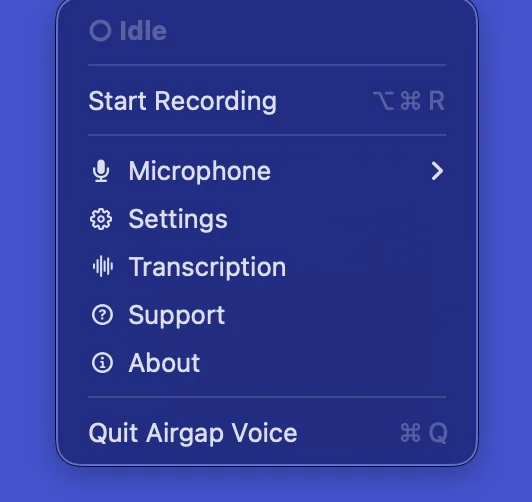
Click the Airgap Voice icon in the menu bar to reveal the main menu:
The main menu showing all available actions and status.
Item
Description
Status Indicator
○ Idle (grey) when not recording, ● Recording
(green) when active.
Access help resources, report bugs, or request features.
About
Version info and legal links.
Quit Airgap Voice
Exits the application. Shortcut: ⌘Q
Recording & Transcription
How It Works
Click Start Recording in the menu or press ⌥⌘R.
Speak naturally — transcribed text appears in real time (< 250 ms latency) in
whichever application currently has focus.
To stop, click Stop Recording, press ⌥⌘R again, or let
Auto-Stop handle it (if enabled in Transcription
Settings).
100% Local Processing
All audio processing runs entirely on your Mac's GPU using a neural network. No audio
data ever leaves your device — the engine is physically incapable of connecting to the
internet. You can verify this with Activity Monitor or a network inspector like Little
Snitch.
Streaming Architecture
Unlike batch-based dictation tools that make you wait for a text dump, Airgap Voice uses
80 ms streaming chunks. Words appear on screen as you speak, preserving your flow state
and cognitive rhythm.
Selecting a Microphone
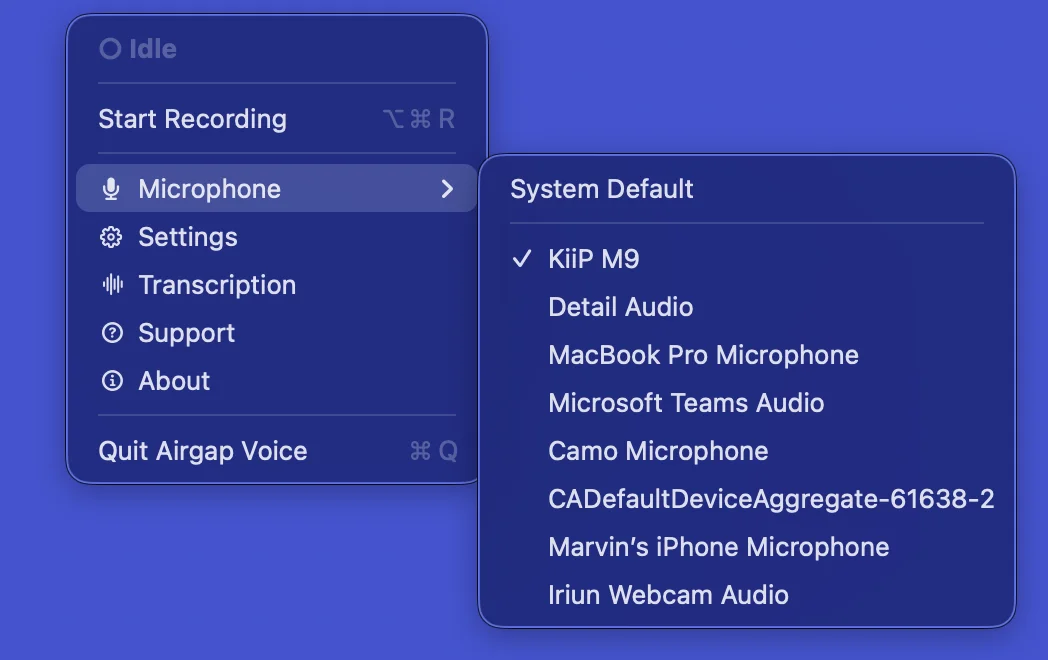
Hover over Microphone in the main menu to see all detected audio input
devices:
The microphone submenu listing all available audio input devices.
System Default — Uses whatever macOS has set as the default input
device.
Named Devices — Select a specific microphone. The currently active
device is indicated with a checkmark (✓).
Tip: For the best transcription accuracy, use a dedicated USB or XLR
microphone rather than the built-in MacBook microphone — especially in noisy
environments.
Settings — General
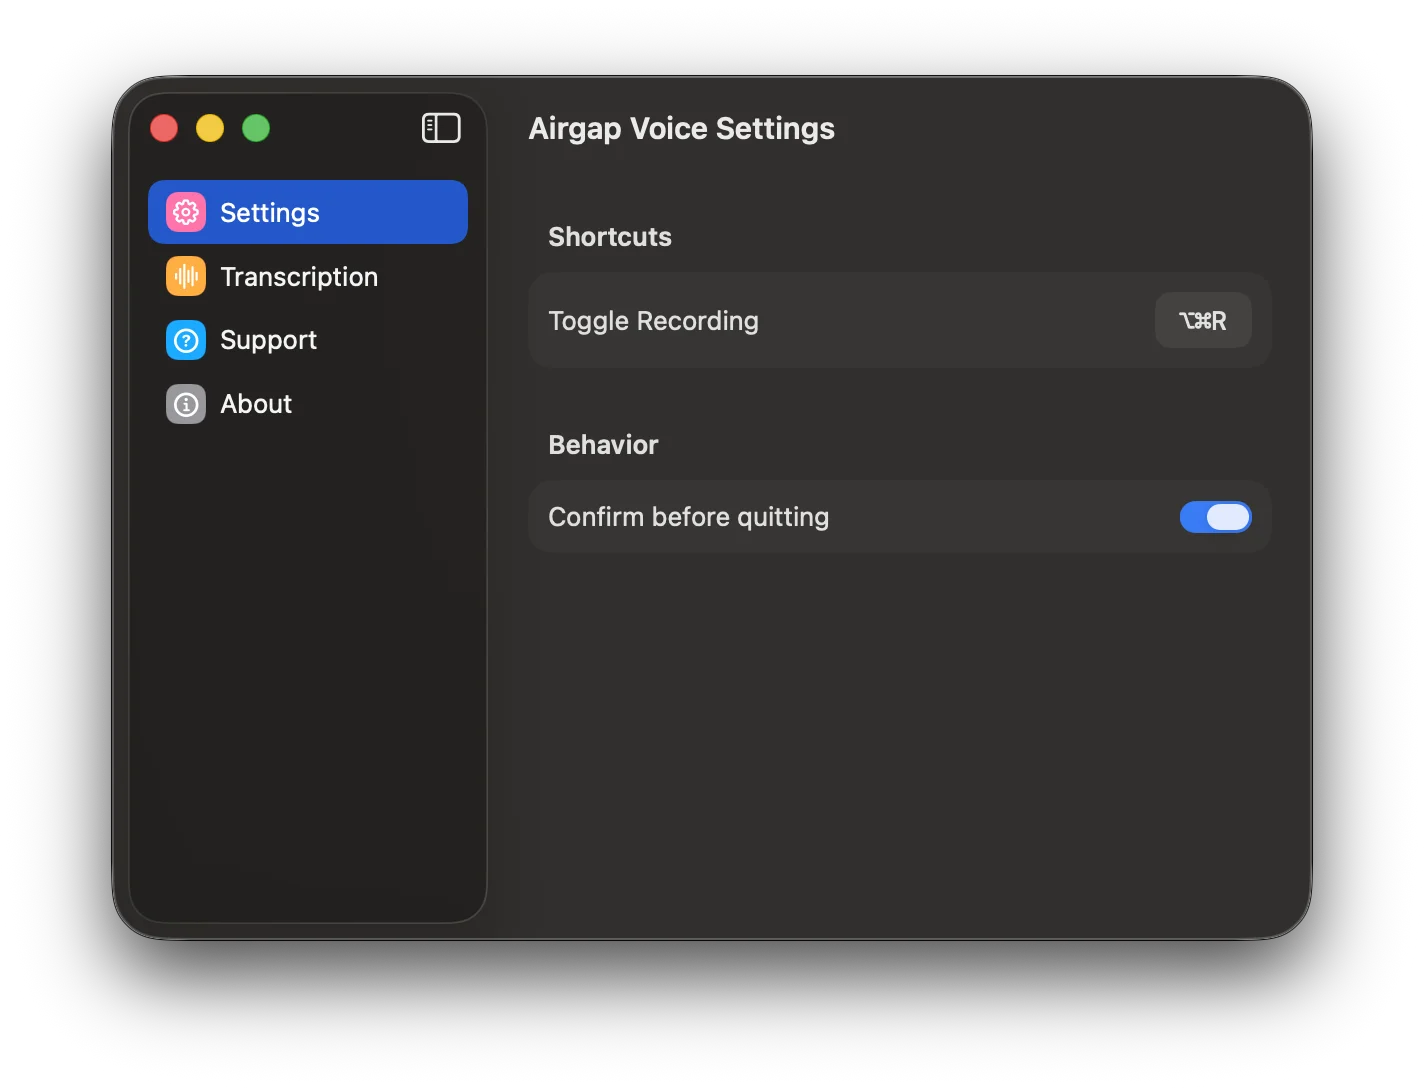
Open the Settings window from the main menu → Settings:
The General settings panel with keyboard shortcuts and behavior
options.
Shortcuts
Toggle Recording — The global keyboard shortcut to start/stop recording.
Default is ⌥⌘R. Click the recorder field to set a custom shortcut.
Behavior
Confirm before quitting — When enabled, the app asks for confirmation
before quitting to prevent accidental closure during a recording session.
Settings — Transcription
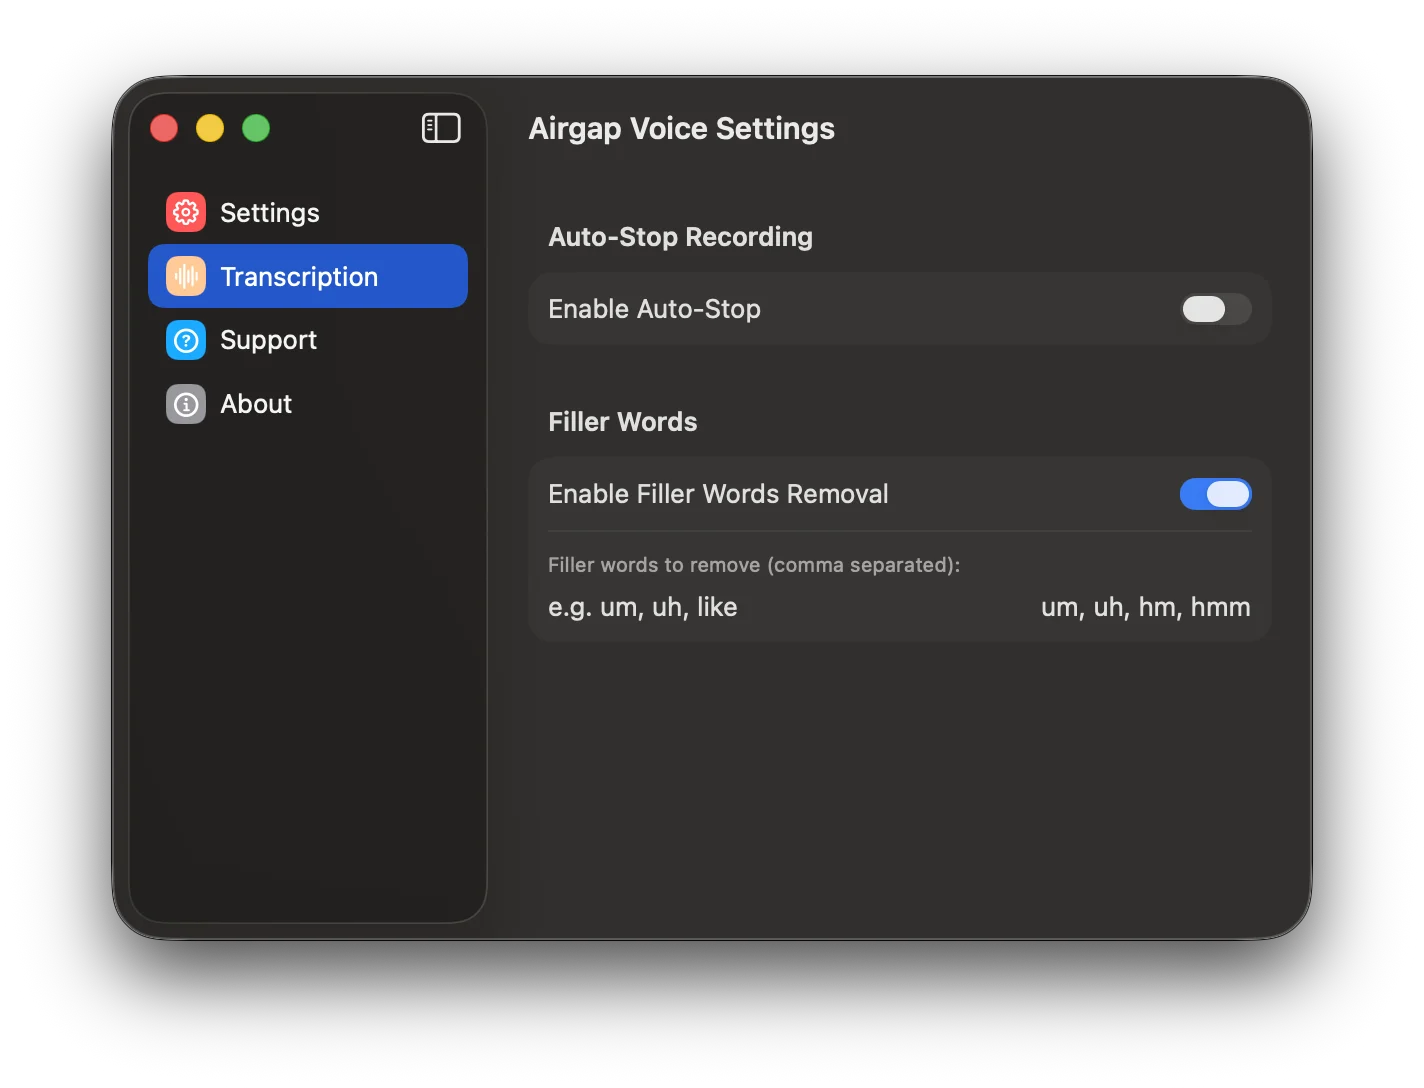
Navigate to the Transcription tab in the Settings window:
Transcription settings for Auto-Stop and Filler Words
removal.
Auto-Stop Recording
When Enable Auto-Stop is toggled on, recording stops automatically after
a period of silence. The silence duration is configurable from 7 to 60 seconds.
This is useful for hands-free dictation: simply stop speaking and the recording ends on
its own.
Filler Words
When Enable Filler Words Removal is toggled on, common filler words are
automatically stripped from the transcription output. The default list includes:
um, uh, hm, hmm
You can customize this list by editing the comma-separated text field.
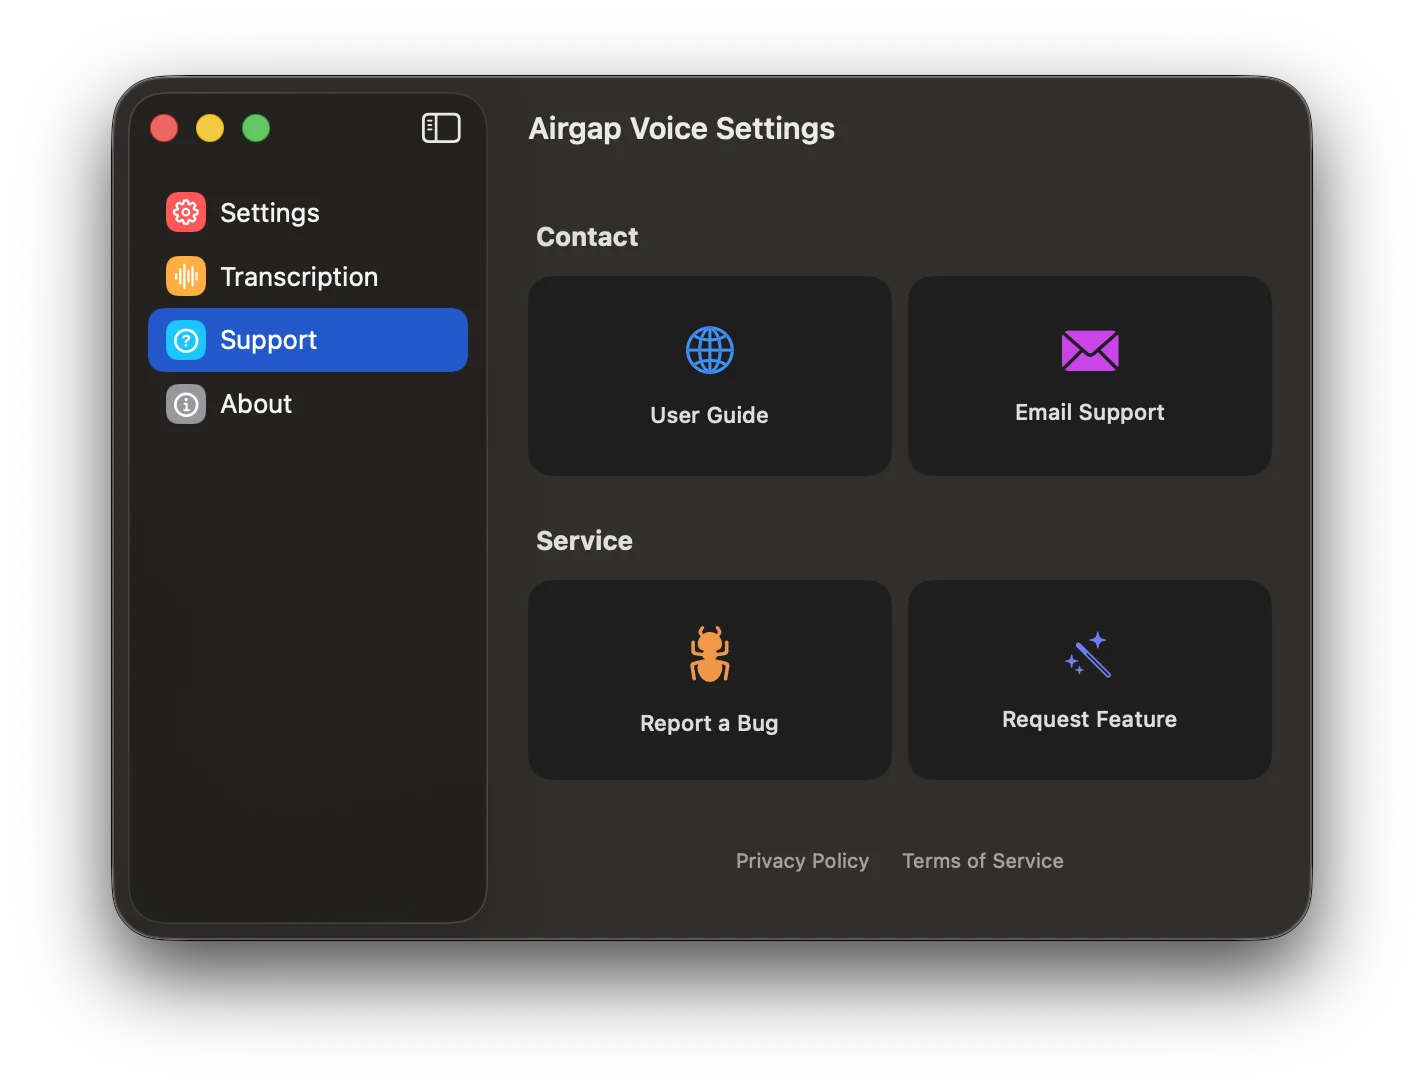
Settings — Support
The Support tab provides quick access to help and service channels:
The Support panel with contact and service options.
Contact
User Guide
Opens this page in your browser.
Email Support
Opens your default email client with a pre-filled support address.
Service
Report a Bug
Opens a pre-filled bug report issue template.
Request Feature
Opens a feature request issue template.
Links to the Privacy Policy and Terms of Service are
also available at the bottom of this panel.
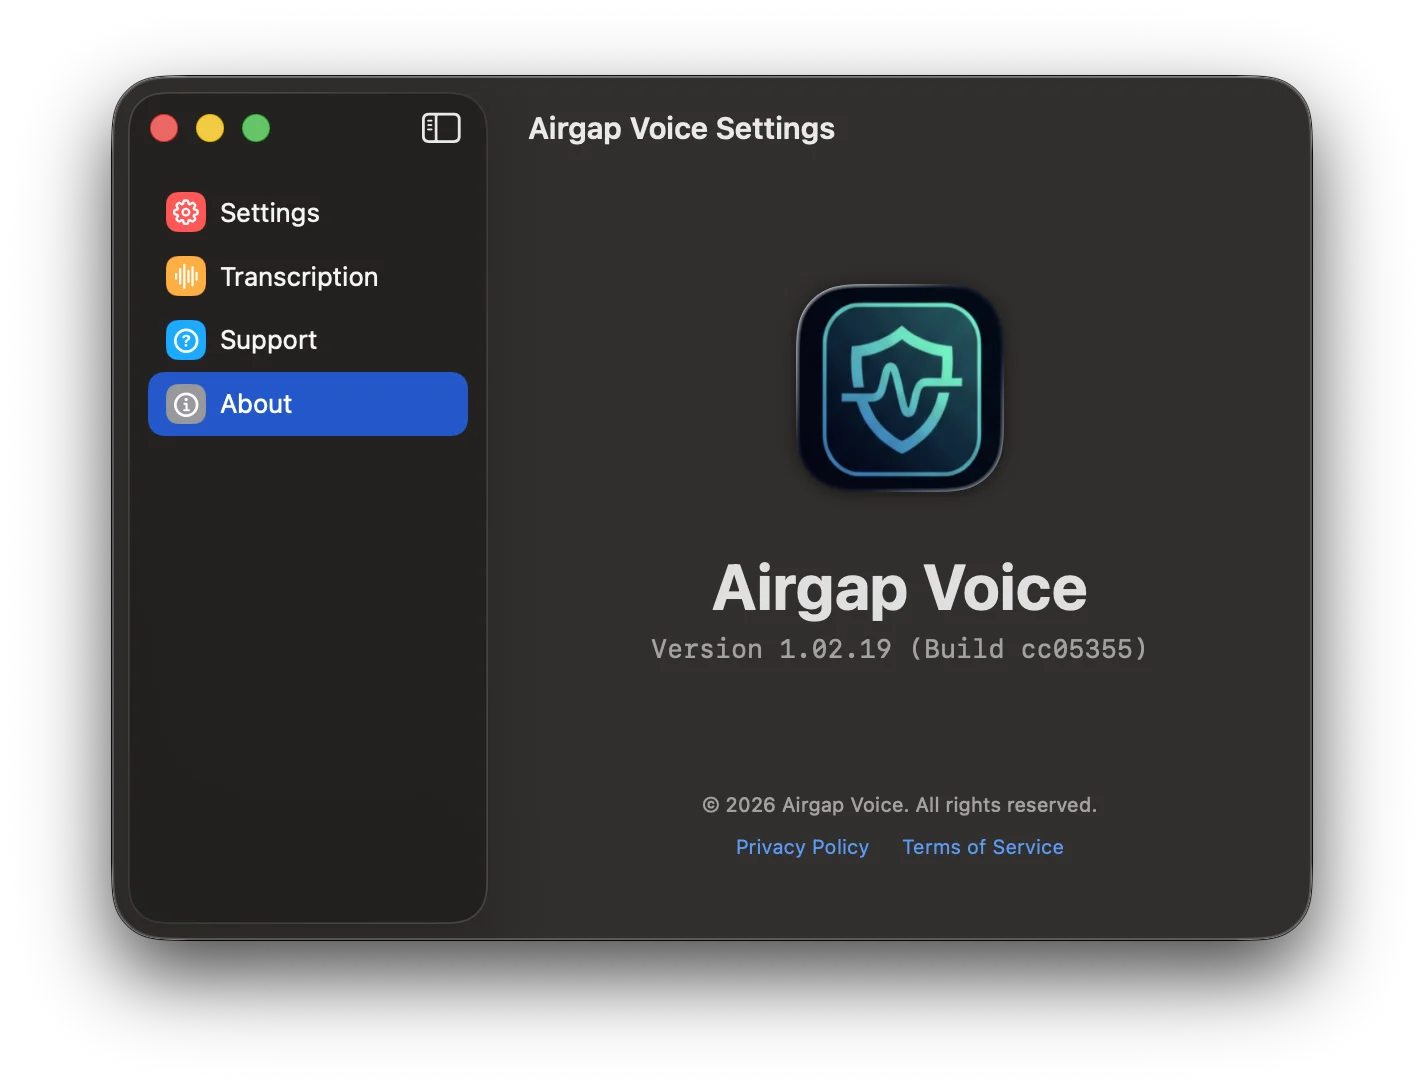
Settings — About
The About panel showing version, build, and legal links.
The About panel displays:
The Airgap Voice app icon
Version number and build hash
Copyright notice
Links to Privacy Policy and Terms of Service
Keyboard Shortcuts
Action
Shortcut
Toggle Recording
⌥⌘R
Quit Airgap Voice
⌘Q
Tip: You can change the Toggle Recording shortcut in
Settings → General.
FAQ / Troubleshooting
"The app isn't typing into my application."
Make sure Accessibility permission is granted. Go to
System Settings → Privacy & Security → Accessibility and ensure
Airgap Voice is toggled ON. See
Granting Accessibility Permission.
"Recording stops too quickly."
If Auto-Stop is enabled, try increasing the silence duration in
Transcription Settings. Alternatively, disable
Auto-Stop entirely for manual control.
"I don't see my microphone."
Ensure the microphone is plugged in and recognized by macOS. Check
System Settings → Sound → Input. Then reopen the
Microphone submenu in Airgap Voice.
"GPU usage is very high."
This is expected during recording. Airgap Voice runs a neural network locally on your
GPU for real-time transcription. GPU usage drops to near-zero when recording is
stopped.
"No transcript appears."
Check that your microphone is not muted and that the correct input device is
selected. See Selecting a Microphone. Also verify that
Accessibility permission is enabled.
Need More Help?
Reach out to our support team or report an issue — we're here to help.